
 01 · START WITH THE WHOLE CATCHMENTMeasure which roof planes feed each gutter run and trace every outlet and downpipe. The visible channel is only one part of the capacity calculation.AI-generated illustration · not a customer property or job
Repeated overflow in heavy rain can make a gutter look undersized. Sometimes it is. Just as often, the restriction is debris, a blocked outlet, a poorly placed downpipe or concentrated water arriving from a valley.
Changing to a larger profile before tracing the complete rainwater route can leave the real bottleneck untouched. A useful capacity check starts with the roof, follows the water into the gutter, and continues through each outlet and downpipe to the final discharge point.
The short answer: capacity is a system, not one dimension
Approved Document H for England says the drainage system should be large enough for the expected flow. That flow depends on the area being drained and the intensity of rainfall; the system’s capacity depends on the size and gradient of its gutters and pipes.
For a real property, that means checking:
- the effective roof area feeding the run;
- roof pitch and any valleys or adjoining elevations;
- the gutter profile, depth and fall;
- the number and position of outlets;
- the outlet and downpipe sizes;
- angles and long distances to an outlet; and
- whether the downpipe and ground connection remain clear.
A wide gutter with a restricted outlet can still back up. A modest gutter with a well-positioned centre outlet may carry more water than the same profile draining to one end. Manufacturer data should be used for the exact system rather than judging capacity from appearance alone.
Why roof pitch changes the design area
The plan area seen on a map is not always the design area used for rainwater sizing. Approved Document H applies factors to allow for pitched surfaces: at 30 degrees, the plan area is multiplied by 1.29; at 45 degrees by 1.50; and at 60 degrees by 1.87.
A roof with a 40 m² plan area therefore has an effective design area of 60 m² at 45 degrees. That does not by itself choose a gutter—local design rainfall, outlet arrangement and product performance are still needed—but it shows why two buildings with similar footprints can impose different demands.
Where valleys combine water from two roof slopes, the receiving section has to cope with both catchments and concentrated flow at one point. Flat roofs, parapet gutters and situations where overtopping could send water into the building need more careful design than a simple domestic eaves run.
What the government tables illustrate
Approved Document H includes example capacities for common half-round gutters laid level, with a sharp-edged outlet at one end and within stated length assumptions. In that specific arrangement, a nominal 100 mm gutter is shown for up to 37 m² effective roof area, 115 mm for 53 m² and 150 mm for 103 m².
Those figures are not a universal shopping list. Changing the gutter section, outlet shape, fall or outlet position changes the result. The table is valuable because it makes the principle clear: roof area, gutter size and outlet size must be considered together.
Profile depth can increase capacity
Deep-flow systems are designed to carry more water than a broadly comparable standard half-round profile, but names and nominal sizes vary between manufacturers. A repair or extension must use the technical data for the actual range.
Brett Martin’s published figures, for example, compare its products at a 1:600 fall. With an end outlet, its 112 mm Roundstyle system is listed at 1.31 litres per second while its 115 mm Deepstyle is listed at 2.31 litres per second. With a centre outlet, the listed figures rise to 2.43 and 4.58 litres per second respectively.
That comparison demonstrates two separate gains: a different profile and a better outlet position. It does not mean every property should be changed to deep-flow, or that fittings from those systems can be mixed.
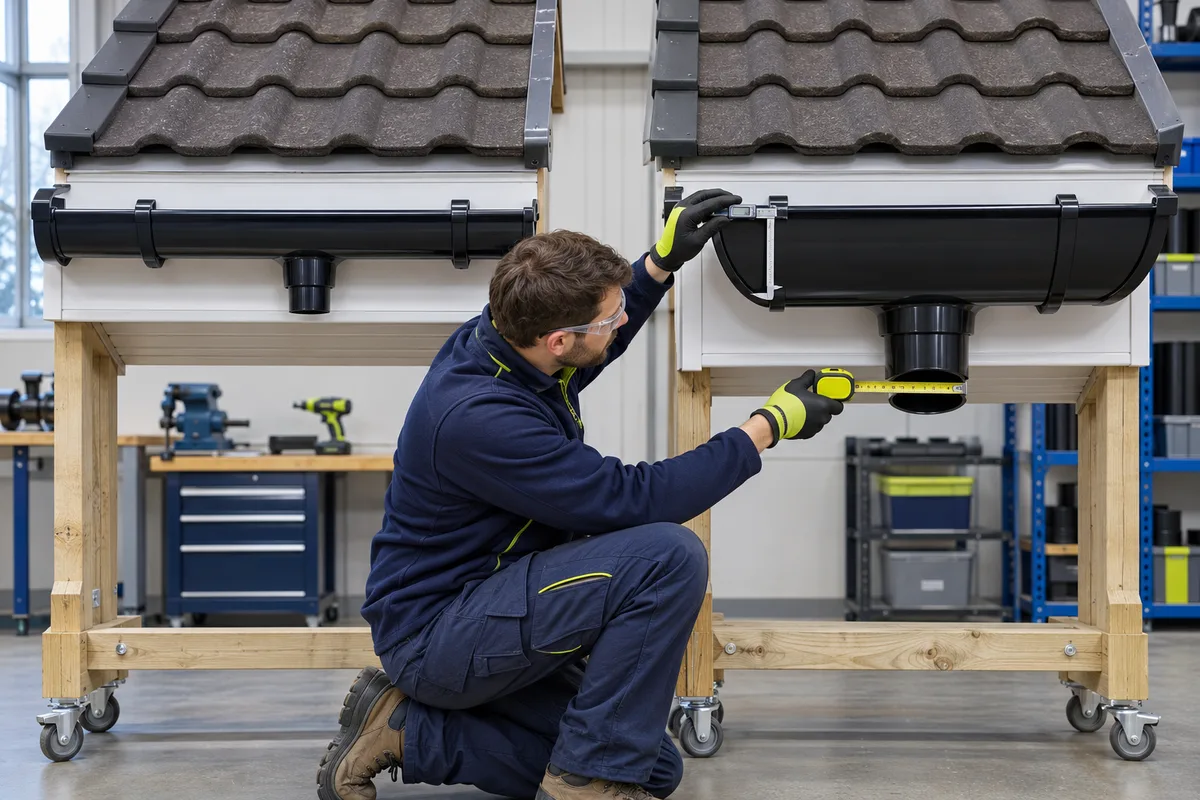 02 · PROFILE AND OUTLET BOTH MATTERA deeper channel can increase capacity, but the outlet must also pass the water into a compatible downpipe. Use the figures for the exact system.AI-generated illustration · not customer work
Outlet position can matter as much as gutter size
Water travelling the full length of a run to one end outlet loads more of the gutter than water dividing towards a central outlet. Two outlets can shorten the path again, provided both downpipes have suitable discharge routes.
Before adding an outlet, check where the new downpipe can terminate. Sending more water to a blocked gully, an unsuitable roof below or the ground beside a wall simply moves the problem. The pipe should be compatible with the outlet and the route must remain accessible for clearing.
Angles also affect performance. FloPlast’s flow calculator changes its results according to the position of angles, the number of outlets, the gutter fall and whether an outlet is at the end or centre. Its guidance says that when a calculated flow comes close to a system’s maximum, the next larger system or an additional downpipe should be considered.
Signs that capacity may genuinely be insufficient
Capacity becomes a stronger possibility when the gutter and downpipe have been fully cleared, the run is correctly aligned, the outlet is open and overflow still occurs predictably during intense rain.
Useful clues include:
- water rising broadly along a clean, straight run rather than at one blockage;
- overflow beginning at the section receiving a valley or several roof planes;
- a long run with only one outlet at the far end;
- an extension or dormer added to the original catchment;
- a new roof covering or edge detail concentrating water differently;
- an outlet noticeably smaller than the connected gutter system; or
- the same problem recurring after the complete route has been tested.
For landlords and managing agents, record the weather, exact spill location and which elevations are affected. For commercial premises, include every roof zone, hopper, outlet and internal or external downpipe in the survey; one elevation may receive water from a much larger hidden catchment than it appears to from ground level.
What can mimic an undersized gutter?
A larger gutter will not solve these separate defects:
- debris: silt, moss or vegetation reduces the usable cross-section;
- a blocked outlet or downpipe: water backs up even when the channel is large;
- a local sag: water pools before it reaches the outlet;
- a leaking union: water escapes below the rim rather than overflowing it;
- poor eaves alignment: fast runoff overshoots or runs behind the channel;
- a restricted gully: the pipe discharges, but water cannot leave at ground level; or
- concentrated valley flow: the gutter may need local design changes rather than wholesale replacement.
Observe whether water is above the gutter rim, escaping at a joint or missing the gutter completely. Those patterns point to different repairs.
A sensible capacity assessment
- Map the catchment. Record each roof plane, pitch, valley and lower roof feeding the run.
- Identify the rainwater system. Note the manufacturer, profile, gutter size, outlet and downpipe.
- Clear and inspect. Remove debris and check brackets, fall, unions, outlets and downpipe routes.
- Measure the effective area. Apply the relevant pitch allowance and local design rainfall method.
- Check the product data. Compare the proposed arrangement—not just the profile name—with the manufacturer’s capacity tables or calculator.
- Locate the bottleneck. Confirm whether the limit is the gutter, outlet, downpipe, angle or final discharge.
- Choose a proportionate change. Options may include correcting a defect, adding an outlet, repositioning a downpipe or replacing the run with a suitable larger system.
- Test and record. Confirm the completed route operates and document any areas needing separate drainage or roofing work.
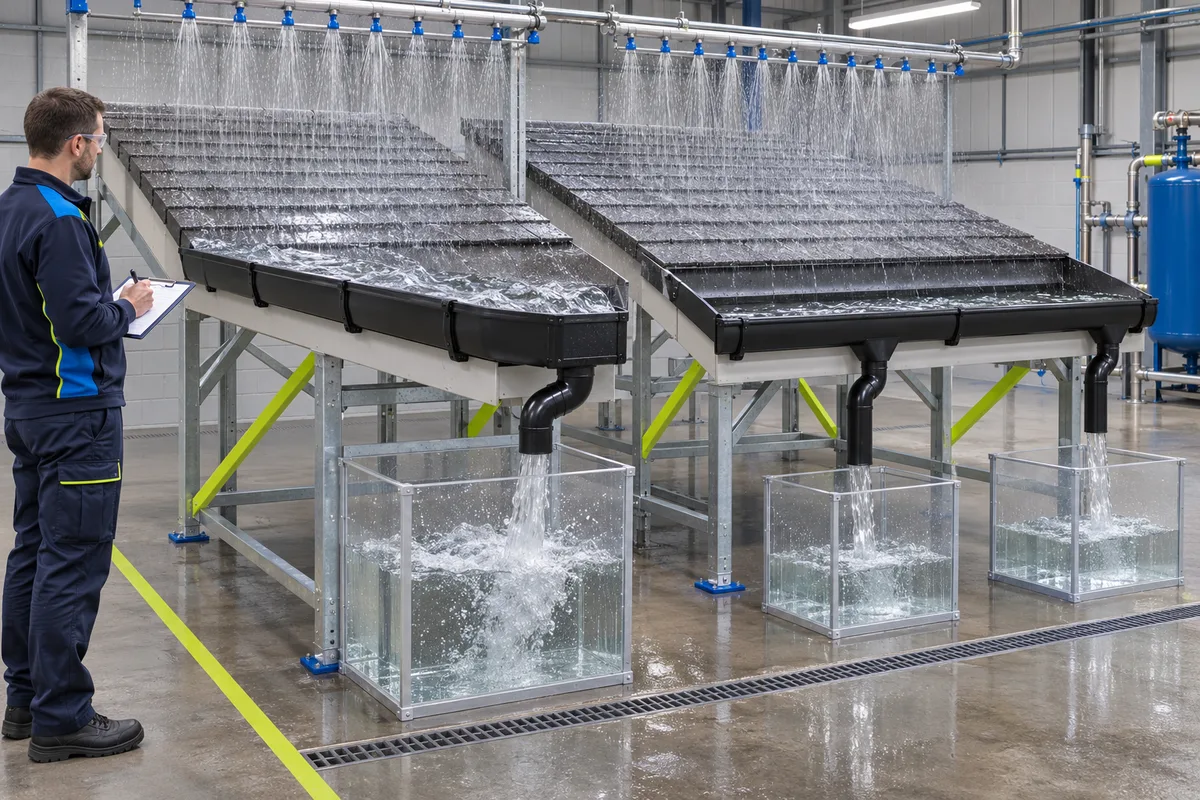 03 · SHORTEN THE WATER PATHA centre outlet or additional downpipe can divide the catchment and reduce the distance water travels—but every outlet needs a suitable route to discharge.AI-generated illustration · not customer work
When replacement is justified
A larger or different system may be justified where calculation shows the existing arrangement is inadequate, compatible components are available, and outlet/downpipe capacity can be increased with it. Replacement may also be sensible where several brittle or distorted components already need renewal.
Do not assume the whole building needs one profile. A short valley-receiving elevation may require more capacity than a simple rear roof. Equally, adding downpipes may be less disruptive than replacing sound guttering if there are suitable drainage points.
The finished design must still respect roof-edge alignment, bracket spacing, expansion details and the property’s appearance. On listed buildings or sensitive historic rooflines, material and visual changes may need specialist advice and consent.
Keep roof-area checks safe
Initial photographs, dimensions and overflow observations can often be collected from the ground. The Health and Safety Executive says work at height should be avoided where reasonably practicable and that suitable, stable equipment must be used. A ladder must not be rested against plastic guttering.
Measuring roof planes, inspecting valleys and altering long gutter runs should be planned with appropriate access. Do not climb onto a roof or overreach from a window to confirm a calculation.
Related guides explain how to distinguish an overflow from a leaking joint, why roof valleys can overshoot a gutter, how to identify compatible gutter profiles, and what to check when a run has poor fall or standing water.
The practical rule
Do not specify larger gutters from one photograph of an overflow. Clear and inspect the complete route, measure the effective roof area, use the exact manufacturer’s performance data and make sure every proposed outlet has a suitable downpipe and discharge point.
Sources and further guidance
- GOV.UK: Approved Document H—drainage and waste disposal
- Approved Document H: rainwater drainage guidance and sizing tables
- FloPlast: gutter flow-capacity calculator and technical guidance
- Brett Martin: rainwater-system flow and roof-area capacities
- Health and Safety Executive: working at height safely
Share this guide
Know someone whose gutters still overflow after cleaning? Share this guide to roof area, profiles, outlets and downpipes.
Share on FacebookShare on WhatsApp